A Simplified Guide for (Not So) Technical Buyers
Onboarding: A Seamless Start in 30 Minutes (or less!)
Cloud IBR is designed for ease of use right from the outset. The onboarding process is quick and efficient, typically taking about 30 minutes.
Before you begin: Ensure you have essential information such as login credentials, S3 repository details, network information, and Veeam encryption keys handy.
Create Login and Begin Onboarding:
Start by creating your login credentials. This marks the beginning of your journey with Cloud IBR, where simplicity meets functionality.
Get To Know The Home Page
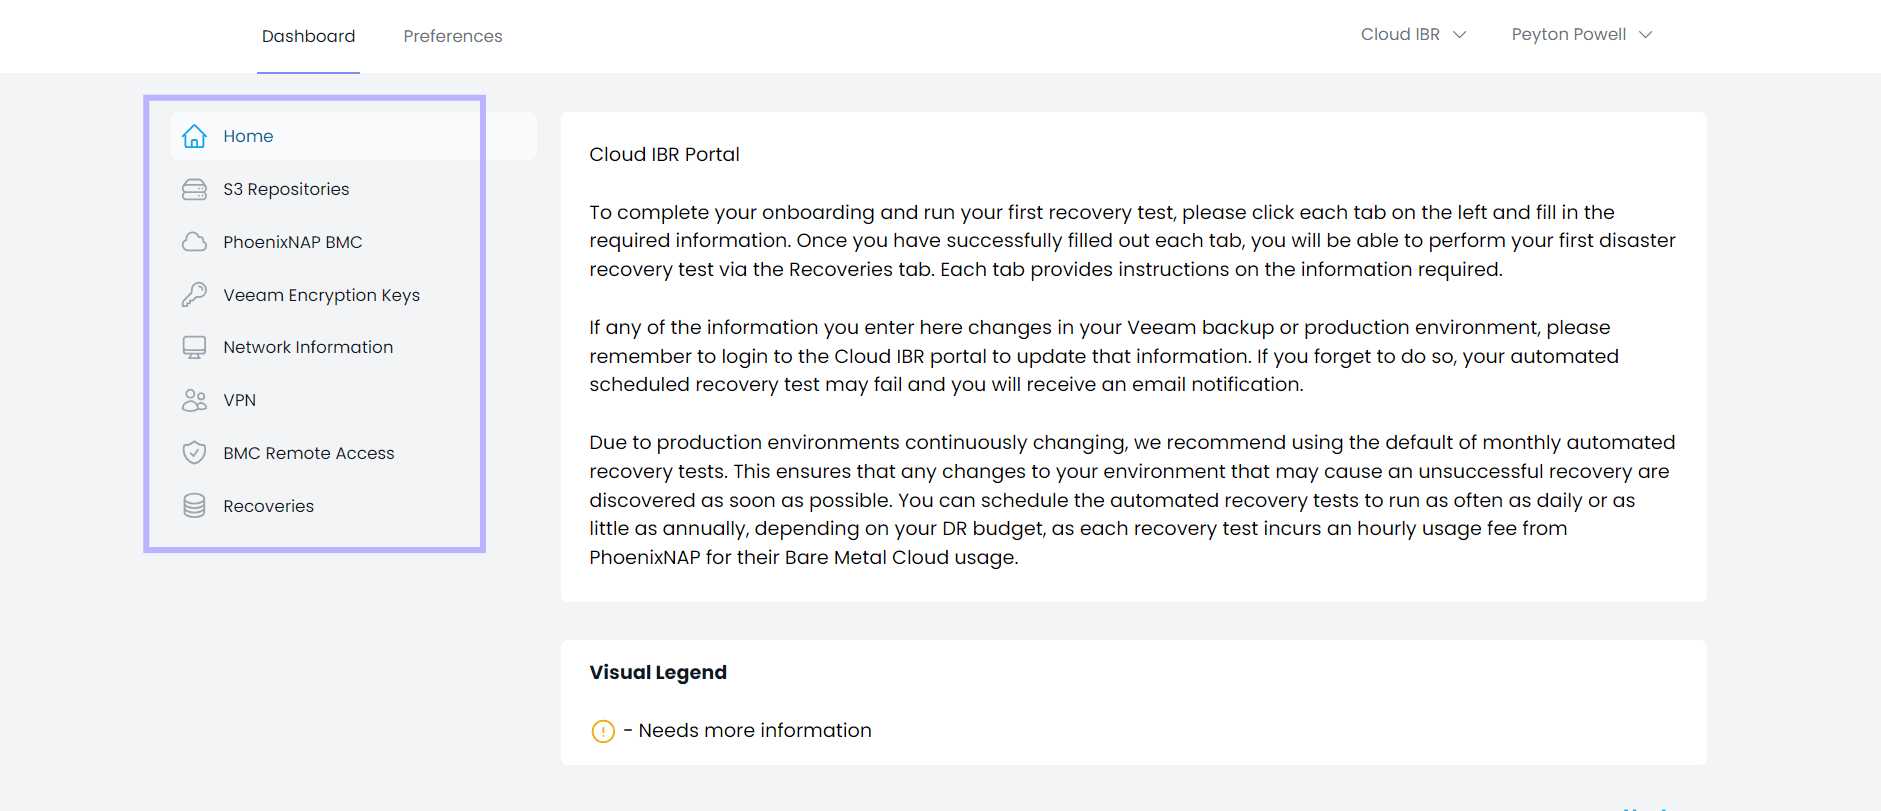
The Home Page of the Cloud IBR customer portal is your command center. Here, you will find various tabs on the left side to fill in your necessary information, paving the way for a smooth setup process.
Setting Up Backup Provider
- Select Backup Respositories
- Add Backup Repository:

Click “Add Backup Repository” and select your Backup Provider. Follow the on-screen directions to fill in the required details. Ensure that the app key permission is set to READ ONLY. Once added, your repository will appear in the list.

Configuring Bare Metal Cloud
PhoenixNAP Bare Metal Cloud (BMC) integration is another cornerstone of Cloud IBR’s offering. Your PhoenixNap account is automatically generated upon signing up for a Cloud IBR subscription. Charges billed from PhoenixNap only occur during a Disaster Recovery Test or an actual Disaster Recovery event for the hourly usage of the Bare Metal Cloud.
Setting Storage Requirement
Storage Requirement: This is the amount of storage needed to recover your environment. This should be enough space to recover all your servers as well as some room for growth during the recovery.
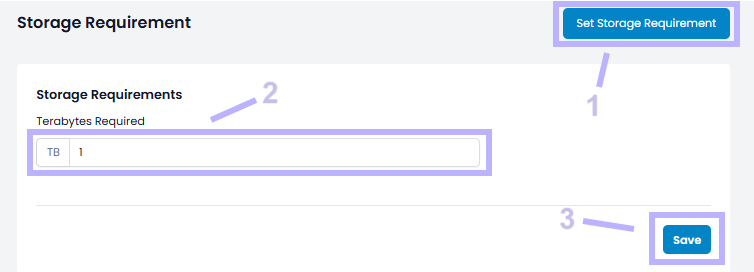
Specify the storage needed for your environment recovery. Enter the number of terabytes (up to 25 TB), and click “Save”. If more storage is required, adjust the quota via the BMC portal.
Setting Memory Requirement
This is the desired total amount of memory for your ESXi recovery infrastructure. The memory amount set will be distributed across your ESXi BMC recovery infrastructure.
- Silver Subscribers: can set up to 512GB
- Gold Subscribers: can set up to 2TB
- Platinum and Platinum Plus Subscribers: can set up to 4TB
*Ensure at least 20 percent free ESXi memory during a recovery
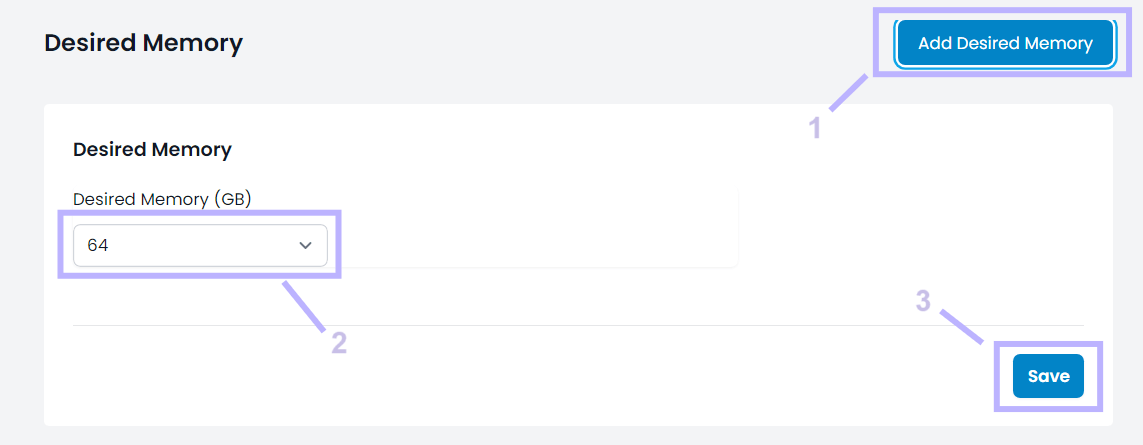
- Click “Add Desired Memory”
- Enter the number of gigabits of desired memory needed for your environment.
- Click the “Save” button and the desired memory will populate in the list.
Veeam Encryption Keys
For Cloud IBR to decrypt your backups during recovery, Veeam encryption keys must be added. If you use the same encryption passwords for all your backups, you only need to add one here. If you use multiple encryption passwords, you must add them all.

- Click “Add Veeam Encryption Key”
- Fill out the information for password hint and encryption key.
- Click the “Save” button and the Veeam Backup Encryption Key will populate in the list.
Network Information and VPN Setup

- Click “Add Gateway”
- Fill out the information for description, IPv4 address and mask.
- Click the “Save” button and the Gateway will populate in the list.
Add Port Mapping

- Click “Add Port Mapping”
- Fill out the information for description, port number, and internal production ip.
- Click the “Save” button and the Port Mapping will populate in the list.
VPN Configuration
IPSEC VPN Tunnels
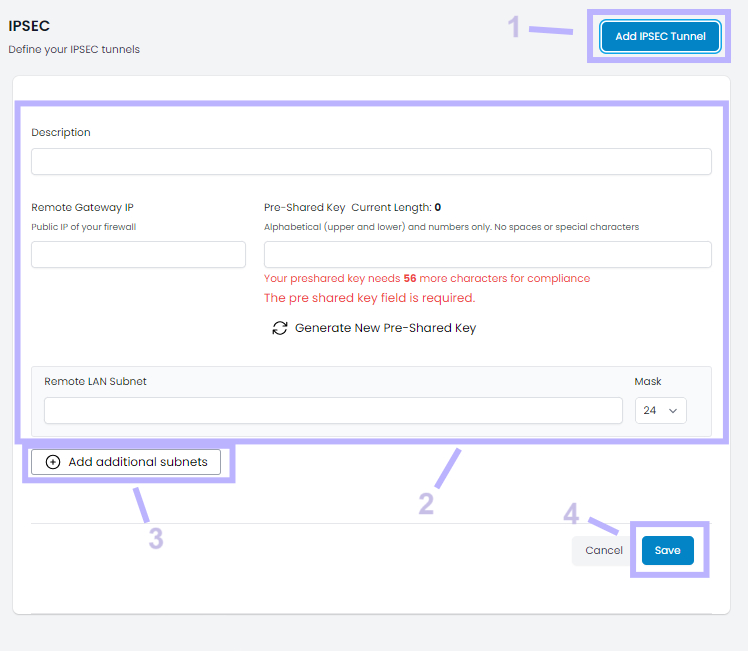
- Click “Add IPSEC Tunnel”
- Fill out the information for description, remote gateway IP, remote LAN subnet and mask.
- If you would like to add more subnets, click the “Add additional subnets” button.
- Click the “Save” button and the IPSEC Tunnel will populate in the list.
VPN Users
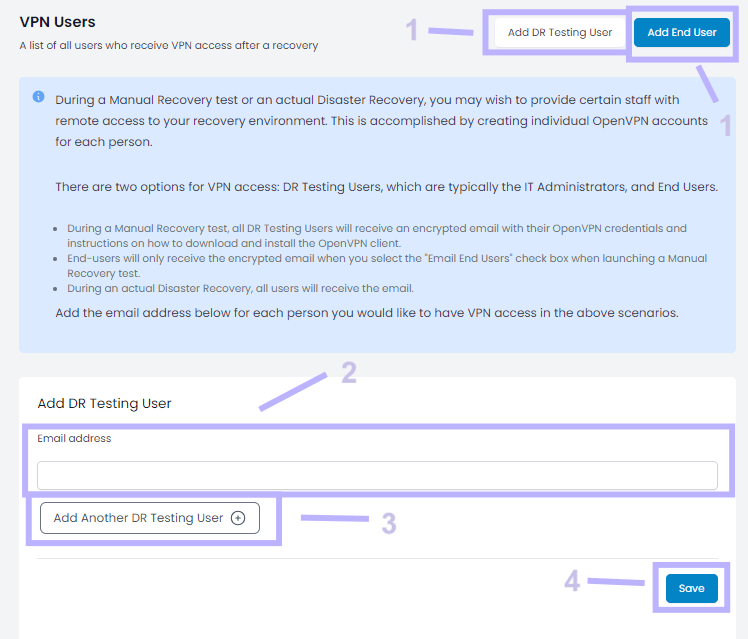
- Click “Add DR Testing User” or “Add End User” depending on the type of user you would like to add.
– During a Manual Recovery test, all DR Testing Users will receive an encrypted email with their OpenVPN credentials and instructions on how to download and install the OpenVPN client.
– End-users will only receive the encrypted email when you select the “Email End Users” check box when launching a Manual Recovery test.
– During an actual Disaster Recovery, all users will receive the email. - Fill out the information for email address.
- If you would like to add more DR Testing Users, click the “Add Another DR Testing User” button.
- Click the “Save” button and the VPN users will populate in the list.
VPN DNS
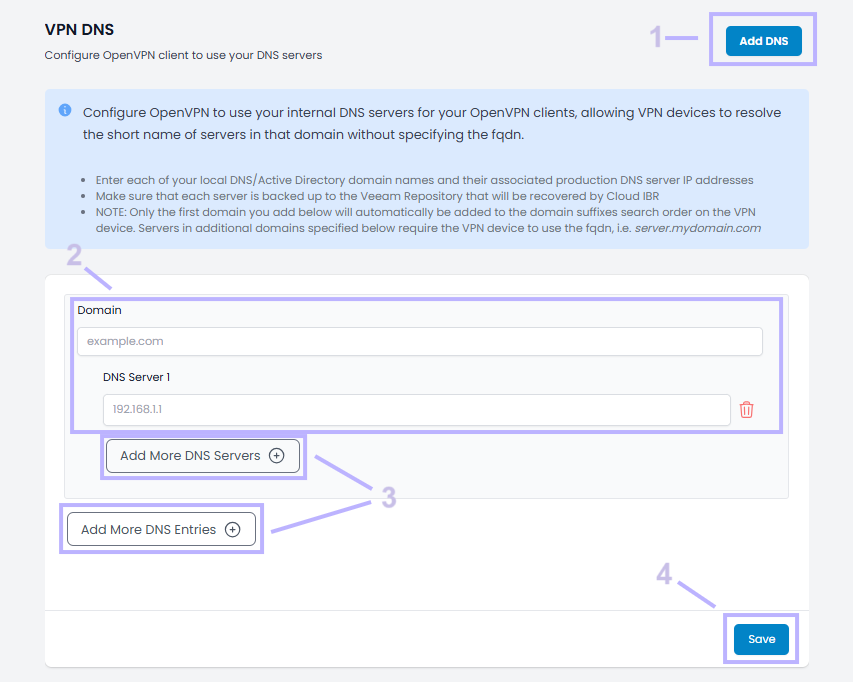
- Click “Add DNS”.
- Fill out the information for domain and the DNS server.
- If you would like to add more DNS servers, click the “Add More DNS Servers” button.
- Click the “Save” button and the VPN DNS will populate in the list.
BMC Remote Access
Managing WAN IP addresses is crucial for remote access into the BMC for IT administrators.
Add IP Addresses
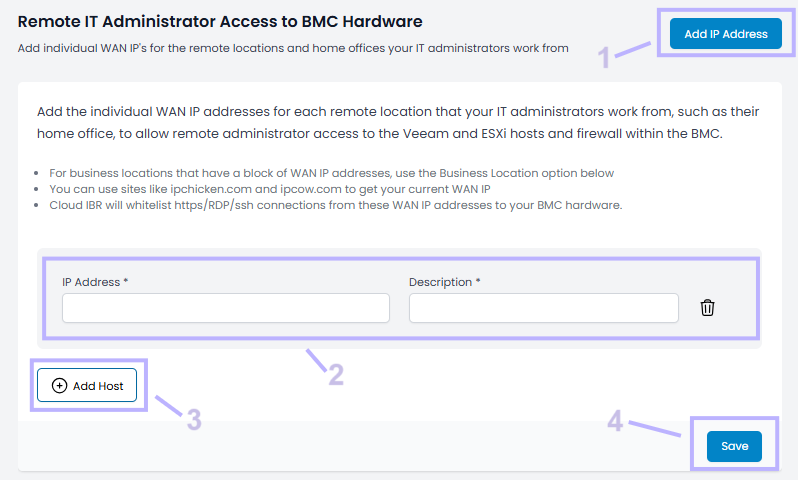
- Click “Add IP Address”
- Fill out the information for IP address and description.
- If you would like to add a host, click the “Add Host” button.
- Click the “Save” button and the IP Address will populate in the list.
Add IP Blocks
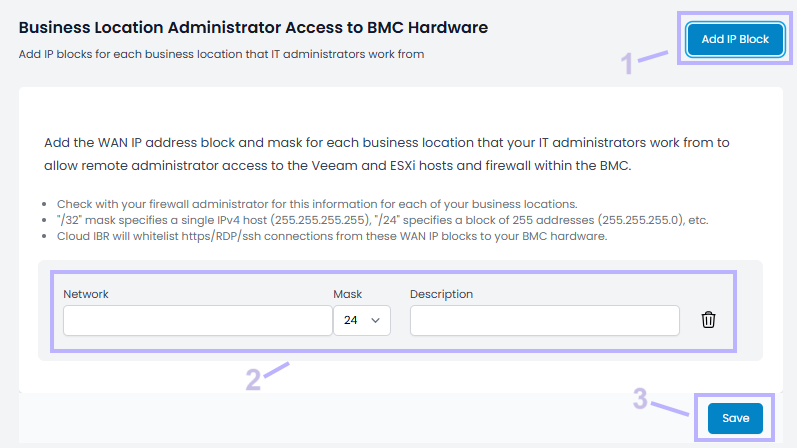
- Click “Add IP Block”
- Fill out the information for network, mask and description.
- Click the “Save” button and the IP Block will populate in the list.
Initiating Recoveries
Start New Recovery:
- Auto Shutdown: Automatically shuts down the bare metal cloud recovery infrastructure immediately upon finishing the recovery test, whether successful or not.
- Manual Shutdown: Leaves the bare metal cloud recovery infrastructure running until you manually stop the recovery. Use this when you want to test your applications and VPN connectivity, or for troubleshooting a failed recovery.
- Disaster Recovery: Only use this to perform an actual disaster recovery when your production environment is down. You will not be able to manually stop the recovery through Cloud IBR.
Restore Latest Recovery Point
Cloud IBR will restore your most recent backups from your object storage. Backup chains often contain old backups of decommissioned servers that we want to exclude from recovery so that we are only recovering your active production servers. On the other hand, if an active production server has not been successfully backed up within the past several days, we still want to make sure it is recovered. The default of 7 days typically covers both scenarios, by restoring the most recent backup of all servers that have a valid backup from within the past 7 days. Backups that are older than your selection will not be restored.
2. Click the “Initiate Recovery” button and recovery will start.
3. Once the recovery is complete, you will receive a pdf report of the test results.
Automating Disaster Recovery Tests
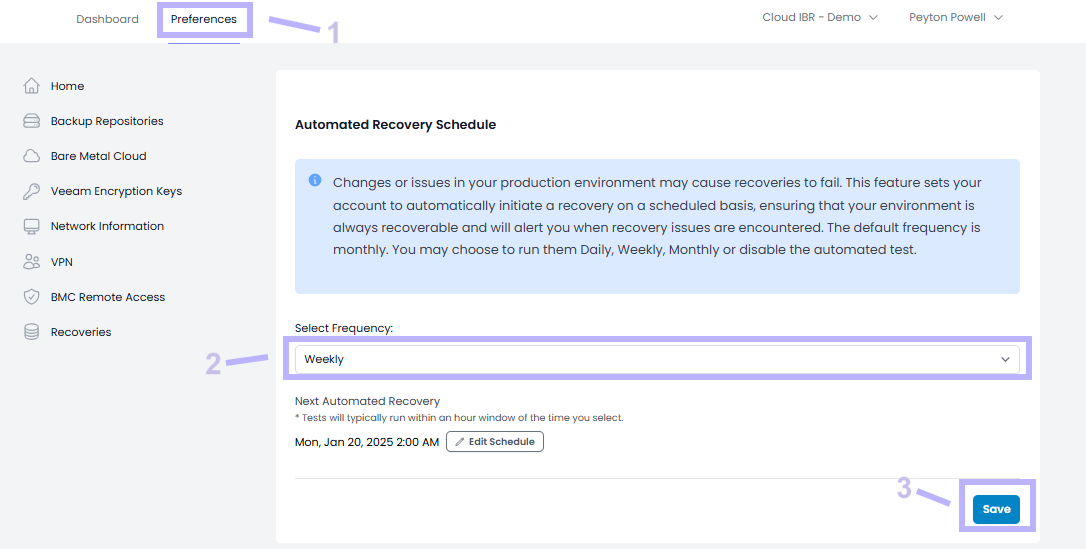
- Click the “Preferences” tab at the top of the screen.
- Select the frequency that you would like the automated test to run. (4 Options: None, Daily, Weekly, Monthly)
- Click the “Save” button to save your Automated Recovery Schedule preferences.
Still Have Question? Set Up A Demo
With Cloud IBR, you are not just subscribing to a disaster recovery solution; you are partnering with a platform designed to keep your business resilient and operational in the face of disaster.
Schedule a demo today and see first hand the simplicity and power of Cloud IBR. Transform your disaster recovery strategy with one click.
Learn More About Cloud IBR
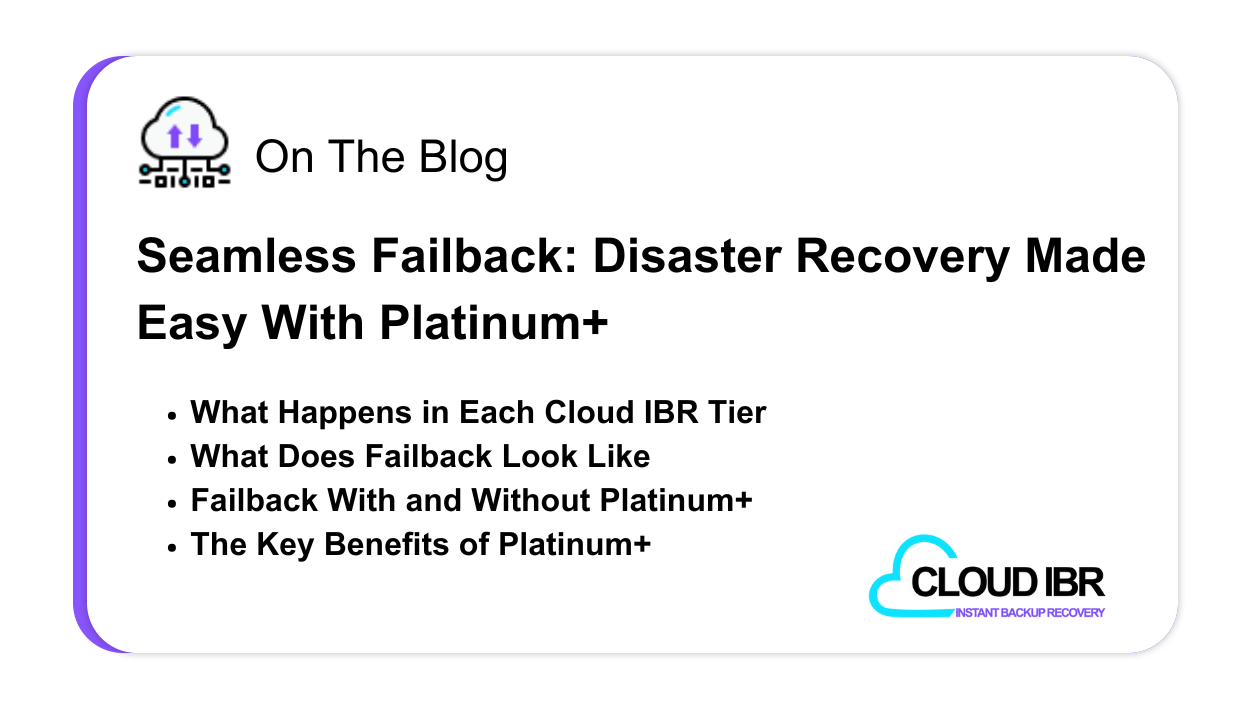
Seamless Failback: Disaster Recovery Made Easy With Platinum+
Disaster recovery isn’t just about getting your systems online, it’s about making sure they return to production smoothly and without extended downtime. Failback—the process of returning workloads from Cloud IBR’s
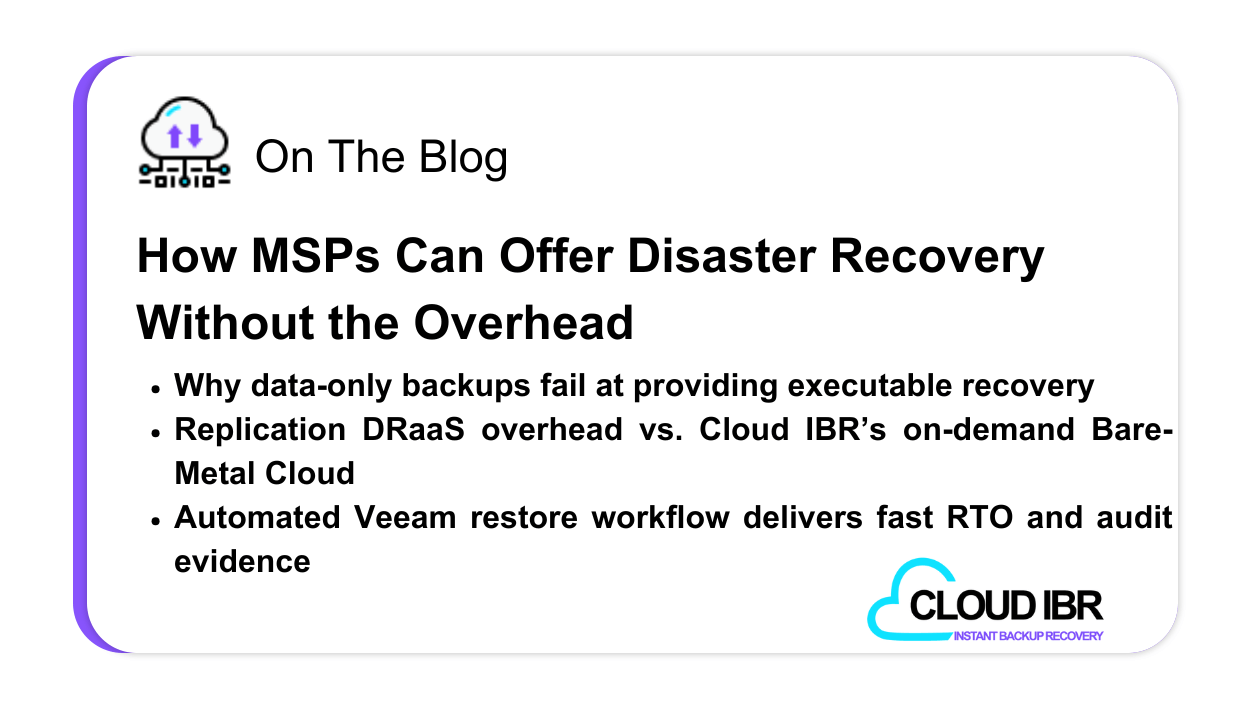
How MSPs Can Offer Disaster Recovery Without the Overhead
Small and midsize businesses are under growing pressure to meet cyber insurance requirements, comply with evolving regulation, and protect against a relentless wave of ransomware attacks. Naturally, they turn to
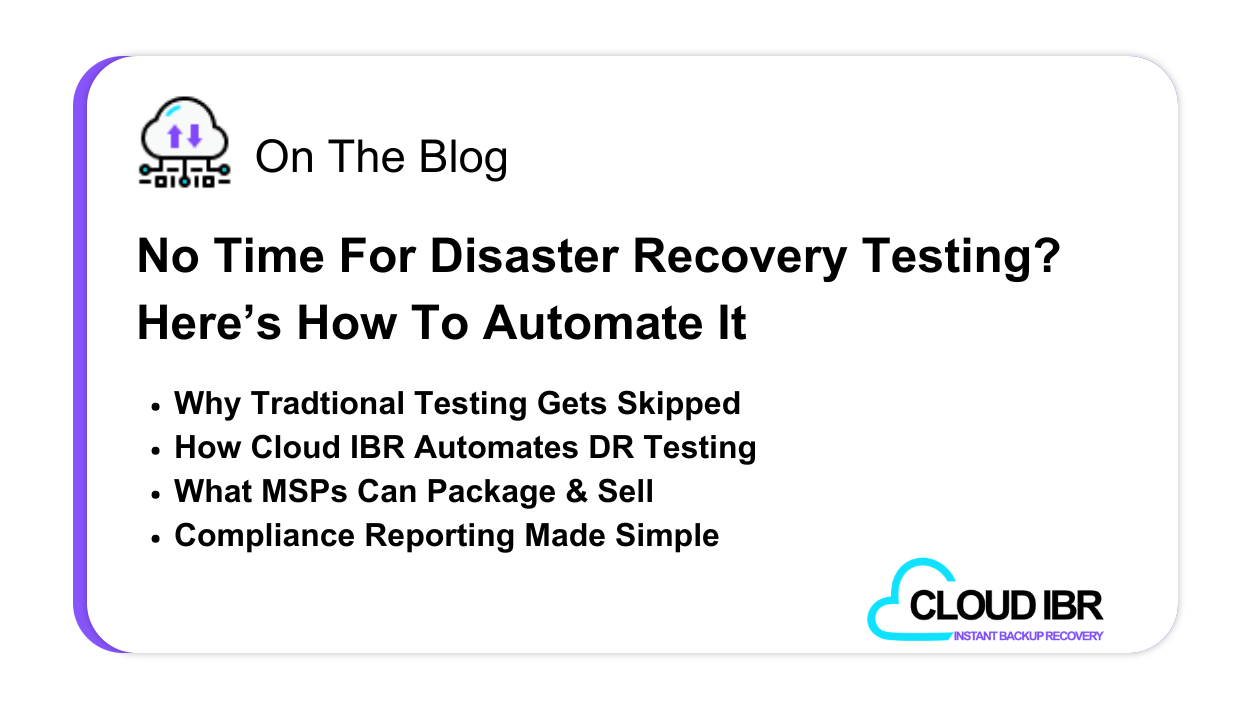
No Time for Disaster Recovery Testing? Here’s How to Automate It
You’ve probably heard this, or said it, more times than you can count. It’s a common excuse in disaster recovery (DR). Not because testing isn’t important, but because traditional DR
